


The main functions of SAM
Content:
1) Start a voice recording
2) During the recording
3) Pause recording
4) Playback and voice-over
5) Add photos
6) Photos in Speak-A-Message
7) End your recording
8) Forward message
1) Start a voice recording
Start the voice recording by clicking on the red 'Record' button
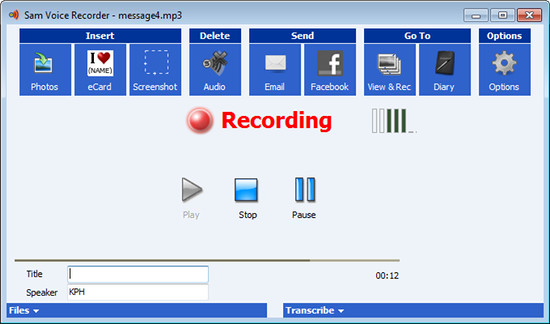
2) During the recording
During the recording you will see a red 'recording light' with the label 'Recording' next to it. On the right you will find an indicator for the microphone levels. You can pause the recording as often as you want to. To pause your recording simply click on the 'Pause' symbol (two vertical bars).
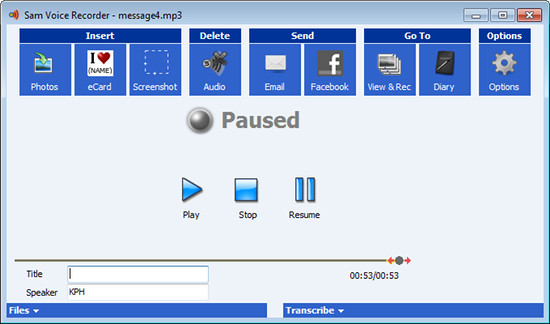
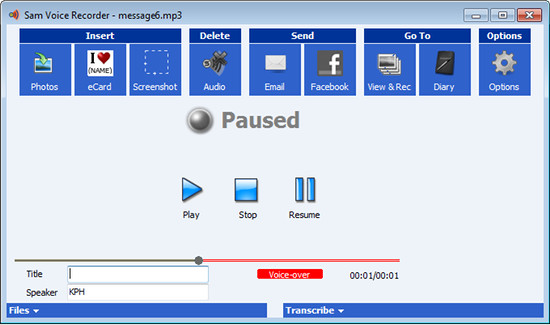
3) Pause recording
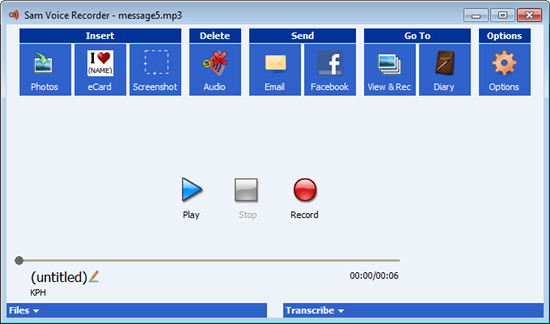
While the recording is paused you can playback your voice message. Use your mouse to pull the slider to the desired position.
4) Playback and voice-over
Playback from the selected position by clicking on the 'Play' button (triangle). The Pro Edition enables you to correct your voice message by recording over your initial message. To continue your recording click on the 'Resume'-button (2 vertical bars). To stop recording click on the 'Stop' button (rectangle).
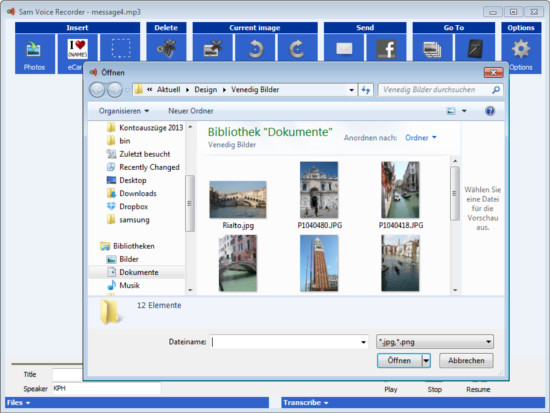
5) Add photos
Speak-A-Message enables you to combine voice comments with photos and scanned documents. To do that go to 'Insert' in the menu bar at the top and click on the 'Photos' icon. This will open the file manager. With the file manager you can choose one or a couple of photos. Note that in the Pro Edition you can insert any number of photos . Click on 'Open' in the file manager in order to transfer the chosen images to Speak-A-Message.
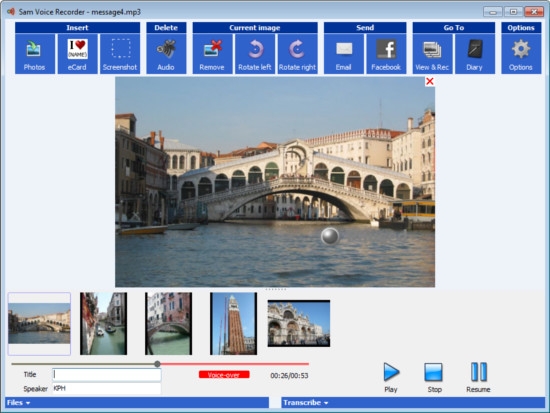
6) Photos in Speak-A-Message
By clicking on on of the photos in the ribbon below, image is displayed in the center of the player. Note that you can change the order of the pictures by dragging the chosen photo with your mouse to the desired location. To continue click on the 'Resume' button (2 vertical bars). In order to stop the recording click on the rectangle.
7) End your recording
By clicking on 'Stop' button (rectangle) your recording ends.
8) Forward message
You can now playback the message and look at the photos prior to sharing it via email or sending it to the cloud: chose the 'Send' tab in the menu bar at the top and click on Email or Facebook.